Wednesday, September 30, 2009

More on the cooling system

I just found some other photos I took related to the cooling system. The water pump on these cars is known to have a short life. It's recommended that when you do the timing belts, you rebuild or replace the water pump. I'm took a gamble and used my old water pump without any modification. It was surprising clean inside and out, which leads me to believe that it's not had a lot of miles on it. Also, it wasn't leaking, there are no signs that it was leaking and the bearings felt great. So, back on it went.


Also, I had to make a couple of gaskets for the coolant manifold that connects to the water pump to the heads. I search high and low for these gaskets. The original part number has been superseded by another number, but I couldn't find anyone who had it in stock. Fine. They're small simple gaskets so I just cut my own from a roll of gasket material.

New alternator belt is here

My new alternator belt arrived today. I'm starting to get used to chasing down and waiting for parts. On a "normal" car, when you need a new belt you go down to Napa and get a new belt. Not so for this car. The alternator belt is a special size and a suitable replacement is a Gates 7M975 (7mm wide, 975mm long) and I ordered it from an industrial belt supplier. Actually, I got 4 of them just in case. You can see the brilliant packing and package handling by UPS. Great job guys!


Sunday, September 27, 2009

Engine almost buttoned up

I was able to get the cam covers back on, as well as the water pump and the carbs. Most of the fuel and coolant lines have been replaced at this point, but I just found out the fuel line kit I bought is missing a large section. I need to contact Dave and see about getting the last piece.


Since I had the cooling system drained, I replaced the thermostat. An OEM F-car thermostat is like $75 and I heard that a suitable replacement is one from an MkIII Golf. The dimensions are almost exactly the same. I had to drill an internal bleed hole like the OEM one. Strangely, there is a stamped dimple on the VW thermostat where the hole should be.


One other thing I did was drill out the original bleed screw in the thermostat housing. There are two bleed screws in the cooling system -- one on the thermostat housing and one on the radiator. The screw on the radiator is a true bleed screw. It's drilled so you don't need to remove the screw completely to bleed air from the system. The thermostat housing screw is solid and requires complete removal to bleed. This modification turns this screw into a true bleeder so you don't need to remove it completely.


Getting closer now to try and start the engine. My list of todo/toget is:

- alternator belt (on order)
- final sections of fuel hose
- change engine oil
- get coolant (6 gallons!)
- get spark plugs

Am I missing something? I'm sure I am...

Tuesday, September 22, 2009

Wheels & tires in the future

I know it's a bit early to think about this, but at some point, I'll need to get new tires. Before this car was put into storage, it looks like the wheels were refinished and new tires put on. Of course, this was 20 years ago so now I've got a set of brand new 20 year old Pirelli P500 tires. They look great but are totally unsafe because of the age.


These are factory 14" alloy wheels and the stock tire size is 205-70/14. Not a lot of performance tire options in this size. One choice is the Sumitomo HTR 200 from tirerack.com. It's H rated (same as the P500) but I have no experience with this brand. Another option is to get new wheels in 16" where there are more tire choices. However, this is an expensive option. Replica 16" 308 wheels are $1200 for a set from the UK. Discount Tire has a Voxx wheel which is similar in style to the OEM wheels and are only $109 each.


Decisions, decisions...I'm pretty sure the almighty dollar is going to be the main factor here.

Monday, September 21, 2009

Replacement fuseblocks

As seasoned 308 owners know, one of the weakest part of these cars is the electrical system -- specifically the fuseblocks. The factory ones will fail at some point in the car's life. The originals are riveted together and over time will loosen and corrode, increasing the resistance then overhead and melt. These replacements came from Birdman and are reportedly a tremendous upgrade from OEM. As Birdman says, "There are only two kinds of Ferrari OEM 308 fuseboxes: those that have left you stranded and those that will." His replacements are well made, labeled left and right and come with new mounting screws and tandem terminal clips where needed. All I need to do is find the correctly sized glass fuses.


My current fuseblocks look ok from the front and I don't know if there is truly a problem with them or not. I need to get a new battery at some point when I'm ready to check out the electricals. I figure it's better to replace the fuseblocks, which are known to be problematic, and go from there.

Sunday, September 20, 2009

Timing belts - done!

I was able to get the other timing belt installed. At first I though it'd be a hard since it's on the front cylinder bank, but it was just as easy as the rear. Same procedure -- lock the cams, mark the belt, remove the old tensioner bearing, clean everything, transfer the marks to the new belt, install belt and tensioner then tension belt and torque the bearing.


The old tensioner bearing was, however, more stuck than the first one. It took me probably 30 minutes to pull the thing off and of course, it destroyed itself on the way out and ball bearings were all over the floor. The inner race and bearing cage remained on the tensioner. After unbolting the tensioner, I had to heat the race with a torch to get it off. The tensioner mechanism was also seized and had to be pried apart. After lots of cleaning lubrication, the tensioner moved freely and everything bolted up fine. One step closer to starting the engine!

Saturday, September 19, 2009

Timing belts (the easy one first)

After replacing the fuel lines on the left side of the car, I can now focus on the right side of the car. This means, replacing the timing belts. There are some great resources online and I followed the great how-to by Birdman on timing belt replacement. I started with the rear timing belt, since that's the easy one. First, I had to make myself a device to lock the camshafts. I made this with two piece of oak and four bolts.


The purpose of this device is to lock the camshafts to prevent them from turning. During the timing belt replacement, the camshafts and crankshaft must not move. Here's a shot of it in action. You can see that all it does is clamp around the cams so they can't move. You can also see the marks I made on the old belt. I transferred these marks to the new belt so it goes back on in exactly the same place as the old.


With the cams locked and belt marked, I remove the belt tensioner bearing nut and try to pull the bearing off. Hmmm...no dice. The bearing is stuck. Since I'm replacing it, I don't care if I need to destroy it to get it off. After some persuasion of the hammer kind, the bearing comes off (and apart).


Good thing I didn't wait to replace the belts and tensioners. All the grease in the bearing was basically gone. What was left was dry and crumbly. The belts didn't look so hot either. The new belt is soft and flexible. The old belt is hard dry and cracked.


Well, only got one replaced tonight. I'll save the other one for another day.

Wednesday, September 16, 2009

Sad news for the radiator

I found a shop in West Seattle that does radiator repair. The guy said there was probably a leak at the top seam where the core is soldered to the top tank. However, there was a more serious matter. There is a fair bit of corrosion inside the radiator. I had two choices -- he could either pull the tanks and rod out the core, or just do a re-core. Either way would cost about the same amount. I'm going the re-core route and it should be ready in about 2 weeks.

Thursday, September 10, 2009

Look, a surprise in the doors!

One of the things that needs to be re-assembled is the interior. It looks like the inside was reworked at the same time it was being repainted. The seats and dash are in, but most of the trim and door panels are out. When I was looking at the guts of the door, I noticed something that looked out of place. There was clear plastic sheeting, duct tape and zip ties that did not belong. Inside each door, there was something odd suspended in the space next to the window. Turns out that it's someone's 80's hack for the speakers.


This is what appears to be a speaker crossover from a home speaker. A crossover is an electronic device that takes a single speaker output and splits the signal for separate woofer, mid and tweeter speakers. I suspect that someone gutted a home speaker, pulled out the crossover panel, wired it to component speakers in the car, put the entire crossover in a plastic bag, then hung it inside the door. Crazy!

Saturday, September 5, 2009

Finally, some assembly

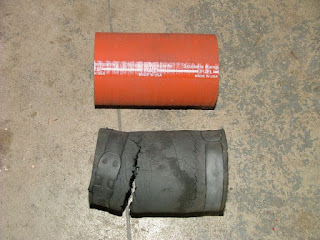
I'm finally getting around to replacing some of those pesky old fuel lines. Good thing too -- almost every one of them was old and cracked. Here is the big hose that connects the fuel filler and the gas tank. Imagine trying to fill your tank through that! Half the gas you pump would end up on the ground at the station!


I also replaced the smaller lines going to the fuel filter and pump, as well as all the other lines coming from the left fuel tank. I should also mention that I ended up pulling the left fuel tank as well because I could not get the fuel filler hose on with the tank in place.


This last shot is from under the car. It shows the lower crossover line running between the tanks.

Friday, September 4, 2009

More attention to the cooling system

Since I now have replacement coolant lines, I figure I should finish draining the cooling system. The car is completely off the ground so it's a good opportunity. With buckets in hand, I crawl under the front of the car to remove a section of coolant line near the radiator. While I'm at it, I'm going to remove the radiator to have it checked out. Of course, this means removing the front hood (or bonnet to the Brits). Fortunately, it's made of aluminum so it's light and easy to manage single handedly.
I pull the radiator and inspect it. Right in the middle at the top tank, there is a spot of corrosion. Hmmm...probably a leak. I'll have to find a radiator shop that does repairs to get this fixed.

Thursday, September 3, 2009

Engine turns, no binding

The one thing I assume is that the engine is fine internally. Up until now, I haven't done anything to check that assumption. Now that I finally have a 36mm socket, I can turn the engine by hand to make sure it turns freely. For some strange reason, I could not find the correct deep socket to remove the spark plugs. Since this car is missing the factory tool kit (and the factory spark plug wrench), I ended up buying a spark plug socket set from Schucks. The set included six sockets, and the last one I tried ended up being the right size. I pulled out all the plugs and apart from a little surface rust on the outside, they look ok.


With the plugs out, I poured a little motor oil down each hole to add a little lubrication to the cylinders. Then I put the wrench on the crankshaft and slowly turned the engine over. The engine turned smoothly with no binding or noise. Good -- one less thing to worry about.