Saturday, July 31, 2010

Quick Saturday morning outing

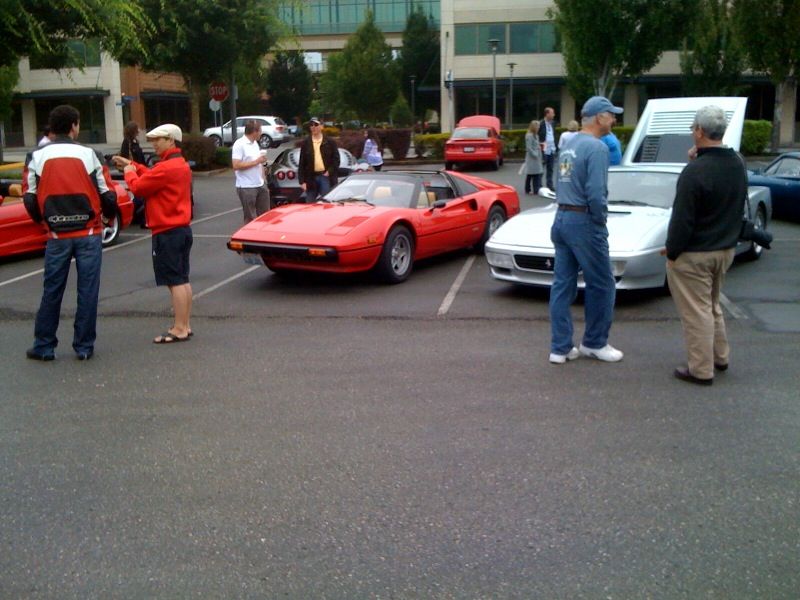
I wanted to take a few hours this morning to head down to the E@RTC gathering. It's something that happens every Saturday morning (weather permitting of course) and I'd been meaning to check it out for a while. It was Ferrari Day and there were LOTS of Ferraris. In fact, lots of many kinds of cool cars. Most of your more popular exotics where there -- Lambo, Porsche, Lotus (only one). There were also a few Acura NSXs, some BMWs and even a few muscle cars. By far, the best showing was Ferrari and probably the most Scuderias that I've ever seen in the same place.


Everyone really came though to see the new Ferrari 458 Italia. It was rumored that one would be showing up, along with a new Ferrari California. I had seen a Cali up close, but I had never seen a 458 before. It was AWESOME. I daresay it's the best looking modern Ferrari. When it showed up, everyone swarmed around it to get a closer look. Now only if I had an extra $350K laying around...


I was parked next to a beautiful Argento 512TR and had a great conversation about the 512TR and the Testarossa. I had no idea that the 512TR, which is the Testarossa's sucessor, is almost a completely different car. To the untrained eye, the Testarossa and 512TR look identical, but there are some pretty major differences. You learn something new every day!

Here's a shot of me as I was getting ready to leave. The event started at about 8am or so and the crowd started to thin out at around 10am. I had other commitments so I needed to get going. Fortunately for me, the 308 started right up and I was able to leave the parking lot without any embarrassing noises.

Friday, July 30, 2010

It's always something, isn't it?

Tonight when I got home from work, I wanted to spend some time in the shop. I wanted to richen up the idle mixture just a little more, as well as install some foam insulation under the front hood to improve the airflow around the radiator. I go out to the shop, reach down for the driver's side door handle and...snap! The handle flops around like a fish out of water. What now? Don't even ask me how it happened, but the cable connecting the door handle to the lock mechanism broke. I didn't really intend on removing the door panel again, but there I was -- removing the door panel again. Luckily, I'm an old pro by now and replacing the cable only killed about an hour or so.

I moved on to the carbs and opened up the mixture screws about half a turn each. It does seem to run a little better now, but there's still a hesitation. However, I think I can live with it. It was about 9:30 and dark when I got done, and I wasn't able to get to the foam. TK and I needed some food so we hopped in and went down to a great little restaurant 3 miles down the road.


It really feels like I have a "jump in and go" car now. In fact, tomorrow morning I'm going to jump in and go to a local regular car event. They call it E@RTC and it's basically a place where people bring their cool exotic cars on a Saturday morning. I've known about it for a while, but never had the chance to make it. Tomorrow's E@RTC is Ferrari day, so how can I miss that?

Wednesday, July 28, 2010

On the road again -- for real this time

Yes, for the first time in what seems like an eternity, I drove the 308 again. TK had someplace to be tonight and before she left, she helped me put the engine cover back on. I did one final check around the car, started it up and backed out of the garage. First stop -- gas station. The last time I drove the car was on Mother's day and because of the misfire, I was anxious to get it home in spite of the nearly empty tanks. After that, a short 5 mile cruise around the neighborhood. I took it pretty easy (like I usually do) and stayed around the speed limit. At one point, I got a little scare when out of nowhere a cop showed up with his lights and siren on. Couldn't be me, as I wasn't speeding. Luckily, he was in a hurry to catch some bad guys and he blew right past me.

The car's running ok. I think it's running a little lean now as there is a noticeable hesitation around 2500 rpm. Maybe I'll switch back to the 0.60 idle jets. I think they even have sizes in between 0.55 and 0.60 so maybe I'll try one of those. The CV boot is tight and there is no more grease being thrown around. We're in for a bit of a dry spell so maybe I'll get some driving time in!

Wednesday, July 21, 2010

Lean, mean, fightin' machine

In between chores tonight, I had about an hour or so in the shop. I took the opportunity to mess with the carbs a little.

Last year (has it been that long?) when I first started the engine, I was getting lots of popping and spitting back out the carbs at and just off idle. I had heard that this is usually indicative of a lean air/fuel mixture, so I decided to try swapping out my 0.55 idle jets to 0.60 size. This seemed to fix the problem, but I always thought it ran a little too rich, even with the mixture screws turned in pretty far. The exhaust smelled really rich at idle, and although I didn't keep track, it seemed my mileage was really bad.

Since I still had the engine cover off, it was the perfect time to make some changes. I decided to drop back down from the 0.60 jets to the 0.55 jets. Now that I'm much more familiar with 308 engine tuning, perhaps I can use the 55s and still get rid of the carbs spitting. Burning less fuel and getting better mileage won't hurt either.

Once the air cleaner housing is removed, it's really easy to change out the jets on the Weber DCNF. The idle jets are on each side and the main jets are in the center. It took me all of 15 minutes to swap out the jets. I started the engine, turned out the mixture screws a little to compensate for the smaller jets and balanced the carbs again. The result is not bad -- I let the engine get up to temperature and there is almost no popping or spitting. The next free moment I get, I'll put the engine cover back on and go for a little drive to test out the new jetting. Also, since I replaced the XR-700 ignition units, hopefully my misfire issue has been resolved.

Sunday, July 18, 2010

Back on the road...soon...

The paint on my new bracket for the XR-700s finally dried completely and I was able to finish mounting the units. I liked it better when you couldn't see them, but it makes them easier to access...just in case.


I had a bit of a scare when I hooked them up, turned the key and...no start. What? All I did was swap out the XR-700s and check the static timing. What did I screw up now? I went through and checked the basics. All the wire connections were tight. I had a good ground. The strangest thing was that I was getting spark out of the coil, but not at the plugs. Huh? I didn't mess with the wires or the distributors, other than to remove the rear one to verify nothing was broken. I made one final pass and then I saw what happened. Remember that this V8 is like two 4 cylinder engines. Each bank has it's own distributor, coil and ignition trigger. In the spaghetti of wires, I managed to cross connect the XR-700s to the coils. So, the front bank distributor was triggering spark on the rear bank and the rear distributor triggered the front bank. Duh! Once the switched the wires, the engine fired right up.

On to the CV joints. What a messy job! I went through almost an entire roll of paper towels to clean off all the old grease. Each joint is held on the shaft by an external snap ring. Once removed, the joint comes off the spined shaft pretty easily.


Each joint has the outer cage, inner cage, inner hub and six ball bearings. It's a bit of a puzzle to get it disassembled. However, complete disassembly is the only way to get all the old grease out. Once everything is apart, it's an easy but messy job. In addition to all the paper towels, I went through about 5 pairs of gloves on the two CV joints.


After cleaning and reassembly, I repacked both joints with grease. I bought a CV boot kit from Dennis McCann at allferrariparts.com . The kit came with four CV boots, grease and clamps. My old boots were intact, but really dirty and nasty so it was easiest to just replace them.


Other than the mess, I'd have to say CV joint service is one of the easier tasks on this car. Installation was as simple as removal. I cleaned up and reused all the nuts and bolts as they were in good shape. Everything was torqued and I dropped the car back down on the ground. Before putting the engine cover back on, I think I want to tinker with the carbs a little more. Months ago, I switched to larger idle jets because the engine seemed to be running rich. Now I'm thinking it's a little too rich and I'd like to lean it out just a little to see what happens.

Saturday, July 10, 2010

Well that wasn't so bad!

I was feeling a little down about the thought of pulling the half shaft to replace the CV boot. After reading a few posts on F-Chat, I decided to go back out there and give it a go. Would you believe it's actually pretty easy? I spent less time removing the half-shaft than making that silly bracket earlier.

The CV joints are bolted to the flange using allen-head bolts and locking nuts. At first, I was trying to figure out how to get a wrench in there to hold the nut while turning the bolt and keep everything from turning. I did remove a panel under the car so that I could see better. Turns out that the flange actually holds the nut and keeps it from turning. All I needed to do for the inner joint was use a really long extension and a breaker bar. To keep the axle from turning, I stuck a screwdriver in the brake rotor to jam it against the brake caliper. Voila! Six bolts undone without a lot of drama!


The outer joint was easier to access, but it was a bit tricky to sneak a ratchet handle past the suspension arm. After figuring out the position, these bolts were also easy to remove.


Having the half-shaft on the bench, I can see why it was leaking grease. The boot was intact, but the inner clamp was not tight enough to make a good seal. Now comes the messy task of cleaning up this thing, packing it with new grease and installing new boots.

New bracket

One of the reasons I needed to raise the car is because I needed to replace the Allison XR700 ignition modules. I suspect one of them is causing my intermittent loss of the 1-4 bank. They're reasonably cheap so I'll replace them both. The units themselves were tucked in the driver's side wheelwell, behind the inner wheelwell liner. Since I was replacing them, it was a good time to relocate them to someplace easier to access. A few months ago at a car show, I saw a carb'd 308 that also had XR700s. They were on a bracket just forward of the ignition coils. Brilliant! This seems like a great place so I'll do the same thing.


I started with the cardboard template, then made the final one from some angle iron. As soon as the paint is dry, I'll put the ignition system back together.

Another thing I wanted to get a closer look at was the passenger's side inner CV boot. I realized a while back that the boot is leaking and throwing grease all over the place, including the hot exhaust.


You can see it's definitely leaking. I don't think the boot itself is torn. It looks like the clamped end has slipped and grease is slipping past the end. It's a real mess down there. Removing the CV joint is going to be a PITA too. I can barely see it, much less reach it.

Friday, July 9, 2010

Yikes!

Wow, has it really been over a month since my last post? Well, I'm happy to report that I've finally carved out some time to work on the car tomorrow! No, the bedroom project isn't done yet, but it's getting close. After some paint and trim work, we'll be ready to move our bedroom furniture back in. Good thing too -- I'm getting tired of sleeping in the other room.

We're having our once-a-year heat wave here and it's been in the low 90s for the past two days. I came home today and decided to prep the car to be worked on. The engine cover is already off, but I wanted to raise the car on jackstands as well. In the hot shop, I was able to get it off the ground, but that was about it. I was sweating bullets and had to seek refuge in the cool(er) house. Tomorrow, I'm going to pull the distributors off and replace the old Allison XR700 ignition modules and optical pickups with new ones. It's supposed to be hot this weekend as well, but I'll get an early start to beat the heat.

Thursday, May 27, 2010

Changing hats

I've had to swap my mechanic hat for my contractor hat lately. Last Fall, I started tearing apart our bedroom to do some drywall work. When the 308 came along, TK graciously let the bedroom project slide while I worked on the car. That was over 6 months ago and we're both tired of looking at the construction zone. Work on this is going pretty quickly so I should be able to put my mechanic hat on again soon.

Tuesday, May 25, 2010

You slacker, what the heck are you doing?

It's been almost 2 weeks since my last update, and well, there is nothing to update car-wise. I've been too busy with other things to do anything but sneak the occasional glance at the 308 in the shop. TK did help me to remove the engine cover and stash it in a safe place. Other than that, the car sits...

Wednesday, May 12, 2010

It won't fit Captain!

Last week, I heard from a fellow F-Chatter who had a few Stebro exhaust tip inserts to sell. Since I've not been able to get a hold of Stebro directly, I bought the inserts from this fellow. They arrived today and guess what? They don't fit! Does Stebro make different diameters in these things? I know there are long ones and short ones, but I thought the diameters were the same. Hmmm...the inserts are about 2.38" OD and the tailpipes are 2.17" ID. I do have a tailpipe expander, but there's no way I can stretch them 0.2". Oh well, back in the box they go!


On the engine front, I pulled the distributor cap off the 1-4 cylinder bank. There is nothing obviously wrong yet. I suspect that the electronic ignition module is failing. Surprisingly, replacements are not too expensive so I went ahead and ordered a new set. It's actually not stock -- at some point in the past, the points were removed and Allison (now Crane) XR-700 boxes were installed. I guess I'll take this opportunity to replace the ignition wires as well. I bought some replacements a few months ago and they've just been sitting on a shelf.

Sunday, May 9, 2010

Mother's Day adventure

What a gorgeous day today! It was over 70 degrees and the warmest day of the year so far. We were heading to TK's mom's place today for Mother's Day and decided to take the 308 because the weather was so nice. It was 65 miles away and the longest drive so far.

A funny moment happened about 25 miles into the trip. I was in 4th gear at about 60mph when we approached some slower traffic. I downshifted into 3rd and zipped around a minivan to get into an open lane. The open Stebro must have made enough noise to irritate a guy in a Mustang GT two lanes over. I suppose he felt the need to display his manhood (in front of his woman in the passenger seat, no less) because he opened up his window, downshifted then floored it to prove he could make more noise than me. An noise he made too -- it sure was loud but it sounded like complete rubbish. TK and I both looked at each other then busted out laughing. What a clown this guy was.

On the drive down, something was strange. Because the car didn't have a stereo, the only sound in the cockpit was the sound of the engine and the exhaust. At cruising speed, every now and again, there was what I can only describe as a little burble in the exhaust note. Hmmm...strange. But the car seemed to be running well otherwise so I didn't think it was a big deal.

On the way back from TK's mom's place, we stopped at my mom's place. When we stopped, there was something that smelled like burning oil and some light smoke coming out of the engine bay. I popped the bonnet and had a look around. Down in the bowels, I could see the problem. One of the CV joint boots was leaking and was throwing grease onto the rear header. The grease was burning on the header causing the smoke and the smell. It didn't look too bad but will definitely need to be fixed.

After a brief visit, we were headed toward home. About 30 miles away, the car started to act strangely. There was a stumble, followed by some backfiring so I backed off a little. A few seconds later, the stumble went away and things seemed back to normal. A few minutes later, it happened again -- this time it was bad enough to light up the 1-4 Slow Down light. The 308 engine is a V8, but can be thought of as two 4 cylinder engines on a common crankshaft. Each cylinder bank has it's own distributor, ignition coil and carburetors. On this car, each bank has it's own catalytic converter with thermocouples to control Slow Down lights on the dash. The thinking behind the lights is that if a cylinder bank has a misfire or goes out altogether, the cat will overheat due to all the unburned fuel going into it and the thermocouple will alert the driver that there is a problem. This is what happened to me. There was a problem in the 1-4 cylinder bank causing some major problems. The strangest thing is that the problem seemed to be intermittent. The car ran normally for a few minutes, stumbled for a few seconds, then would be ok again. I was afraid we would be riding a tow truck home but the 1-4 bank never went out completely and I was able to nurse us home.

Next steps? I'm pretty sure the problem is in the ignition system. Since the problem is intermittent, I'm sure it will be a PITA to figure it out. And the VC boot? It doesn't look torn so maybe putting a new clamp on it will hold the grease in.

Thursday, April 29, 2010

Exhaust by Stebro

Here is a little before and after video to compare the sound of the Stebro exhaust to stock. As you can tell, the sound from the Stebro is louder and deeper. The deeper rumble is really noticeable at idle. I really like the deep sound, but the volume is just a little too loud (maybe I'm just getting old). The great thing about Stebro is that they can use tip insert resonators to adjust the note and volume of the sound from the pipes. I've been trying to to get a hold of the manufacturer so that I can buy a set. Supposedly, they will reduce the volume by 40%. There are four tips, and I'll be able to use any or all of them to fine tune the sound.


Yes, it appears from the video that my car is blowing a lot of smoke. This is mostly condensation and it goes away when the engine is up to temperature. I know what you're thinking and no, I did not start the engine and rev it up while dead cold. It did warm up for a few minutes before I revved it.

Sunday, April 25, 2010

All Italian Car Show

The local Fiat Club put on a car show today and anything Italian was invited. I actually knew about this show a few months ago and it was my goal to be able to bring my car to it. This was not a judged show but merely a fun event for Italian iron to get together. I've been to many shows over the years, but this was the first one I'd ever been to where I actually registered a car to show. We got there a little late and they put me at the end of "Ferrari row" since there was no more space. We got to share space with a couple of matching 246 Dinos.


It was a fun show. The parking lot was full of Ferraris, Lamborghinis, Alfa Romeos and Fiats. There were a smattering of other makes like De Tomaso Pantera and even a Pininfarina body Cadillac Allante. I got to see a lot of cool cars and talk to some Ferrarista about old 308s. I saw something funny too, this sticker on the rear quarter window on one of the Panteras.


The show was about 30 miles from my house so it was a good chance to get some driving time. The car ran well and on the way home, got a chance to drive on some twisties. Fun!

Saturday, April 24, 2010

Vroom vroom

A few days ago, I put the car back on jackstands to investigate an annoying rattle. The noise was coming from the heat shields on the headers. All the shields were loose and I was able to tighten them down a little by using a hammer and punch to dimple the shields -- essentially crimping them to the headers. That should fix the annoying rattle.

Since the car was in the air, I had a look at the exhaust. I was planning on waiting to install the Stebro but this was a good opportunity to mount it. Removal of the stock muffler was pretty simple. The OEM muffler is a tank! It must weight twice as much as the Stebro.


There are standard exhaust donuts at each mounting flange and these needed to be replaced. Fel-Pro makes donuts for Chevy systems that are the right size and I picked some up from Napa. I also replaced all the mounting bolts. On disassembly, I noticed that one of the catalytic converters had a hole near one of the mounting flanges. Before putting it back on, I sealed up the hole with my MIG welder.


The Stebro was a direct bolt-in replacement. All of the mounting points and flanges are in exactly the same places as the stock muffler. Once I had all the parts, putting everything back together was pretty simple.

So the real question is, how does it sound? Well, it definitely sounds better than stock. The exhaust sound is not necessary louder, but the note is noticeably lower. At higher RPMs, the sound is more full and not as thin as stock. Overall, I give it two thumbs up!

Since I had the welder out, I decided to tackle another small project. With a new set of wheels, I was going to use one of my old wheels as the spare tire. I was missing the bolt to hold the spare tire in the well so I set about to make one. An OEM replacement is $200 and an aftermarket one is $100. Wow! We're talking about a bolt with a knob at the end. There's no way I'm paying that much for a stupid bolt so I'm going to make one that will work. I had a bolt that was the correct thread, but it was a little too short. First, I welded this bolt to another bolt to get the length I needed. Then I drilled, tapped and shaped the head to accept a faucet knob that I found at the hardware store. Result? I now have a bolt to hold the spare tire and it cost me less than $5 in parts.


I'm taking the car to an All Italian Car Show tomorrow. Let's hope for good weather!

Sunday, April 18, 2010

Snug as a bug in a rug

Well, today was the most activity this car has seen in many years. After shuttling TK and me to and from dinner, the day was over and the car is back in the shop. I finally had a chance to use the dust cover that I got a while back. Just before parking for the night, I took the opportunity to quickly aim the headlights since it was dark out. Wow, they are definitely better than the lights I had before. Having 100W on high beam is crazy bright. At some point, I need to do a correct aiming job but just eyeballing it works for now.

Today is polish day!

No, not "Polish" as in the people of Poland. "Polish" as in "buff and polish to make something shine." Today was a nice and sunny day and I spent the first half cleaning, polishing and waxing the car. It's amazing how much better the paint looks after some buff and wax. It's been a long time in coming, but I finally felt good enough about how the car looks to put the nose emblem on.


After cleaning it, I fired up the car and went for a little drive. I need to get some more miles before I can get a feel for it's reliability. I ended up taking two of my neighbors as well as TK for some short trips around the neighborhood. It's funny how I was so nervous the first few times I drove it. Now I'm feeling pretty comfortable with it.


While the car is now drivable, I can't really call it "done" as a project is really never truly done. So far, I've got a short list of things that bug me. Some things can be handled pretty easily -- others, not so much. First, I need to get a front end alignment. The car tracks really well, but the steering wheel is not centered. Since the steering wheel shaft is keyed and not splined, I can't just pull the wheel off and put it in a different place. In it's wonky state, the steering wheel spoke blocks the speedometer and I can't see how fast I'm going. Also, the turn signal cancel mechanism is messed up because of the misalignment. The right signal doesn't always cancel and I end up looking like one of those idiots who forgot to turn off the blinker and it taking right turns around the word. 2nd gear is basically unusable for downshifting so I need to work around it. Lastly is the tuning. While I did a basic job of tuning, I think I need to take it to someone who knows what they're doing. When it's running, it seems to be ok but I've got this hot start problem that's pretty annoying. When I turn the car off and let it sit for about 30 minutes, it's a bear to get restarted. If it just sits for a few minutes, it's not so bad. Time to seek some professional help!

Thursday, April 15, 2010

Yeah, I probably shouldn't have, but...

My car is quiet. With the stock exhaust, you can barely notice that the engine is running at idle. No rumble, no growl...nothing. Not that I'm looking for some crazy straight pipe window shattering noise, but I didn't expect it to be so quiet. A couple of weeks ago, I noticed someone selling a used Stebro exhaust. It came off an early dual cat 308 just like mine. The owner had it for a few years and it had probably a few thousand miles on it. He had replaced it recently with a complete non-cat system and didn't need this anymore. Hmmm...Stebro, eh? There are a number of vendors making aftermarket exhaust and they're all about $2500+ FOR THE MUFFLER ALONE. A Tubi is even more. Ouch, let go of my arm. A complete system including headers will run you well over $5000. Double ouch. The bottom line is that this fellow was selling his used Stebro for about 1/3 the cost of a new one. Stebro makes a quality exhaust with a good sound and their mufflers can accept "tip inserts" which allows you to adjust the exhaust note. Of course, this one is missing the inserts but I think I can get another set from Stebro directly.


On another positive note, I spent a few minutes tonight in the shop with my random orbit polisher. The touchup paint has had some time to dry so I thought I'd try and do some polishing to see how well (or badly) the color match is. Using some 600 sandpaper, I wet sanded the spot on the nose. Then I fired up the polisher using some Meguiars Mirror Glaze #2 fine-cut cleaner. It looks pretty good and at certain angles, you can't notice the subtle color change. Good enough for me! Hopefully this weekend I can roll the car outside, wash the dust off and polish/wax.

Wednesday, April 14, 2010

Quick

I had ten minutes in the shop today and I took care of another little thing that's been bugging me. I finally got some suitable screws to put the speaker grills back in the doors. Now I can say the doors are complete!

Monday, April 12, 2010

It's like watching paint dry...

Well, I sprayed some of the new paint and the answer is...still not a perfect match. It's a lot closer than the last color I used, but it's still noticeable -- at least to me. I've got to remind myself that this is no concours car and I shouldn't be so anal about such things. It's just a car, right? It doesn't matter that the paint doesn't match, right? Ok, it's close enough. Let's move on...

While the paint was drying, I tended to some other little things I've been meaning to do. One was to put the (really dirty and stained) floor mats back in. On the driver's side, I used Birdman's Mat Grabbers to keep the mat from sliding forward. On the passenger's side, I made a mounting bracket out of aluminum to mount my 2.5 lb halon fire extinguisher. Hey, maybe it's paranoia but I've read too many horror stories about these cars burning up. The extinguisher is mounted just in front of the passenger's seat. It's within easy reach and should not interfere with the passenger getting in and out.


The other little detail to deal with was a missing access plate on the engine. At the top of the bellhousing, there is an access port to see the timing mark on the flywheel. Normally, there is metal plate covering this hole so that nothing falls into the bellhousing onto the clutch. Sounds like a pretty important piece, right? Something falling onto the spinning pressure plate would be a bad thing. Well, like so many things on this car, the access hole cover plate was missing. I noticed this a while back but did not do anything about it. A new plate was like $50, for just a flat piece of metal. When the bellhousing was off, I made a cardboard cutout of the access hole so I could make a new plate out of metal.


A little cutting, a little grinding and a little high temp paint and I've got myself a new cover plate. All I need now are the right sized nuts to hold it on as well as a gasket that I'll cut out of a roll of gasket material.