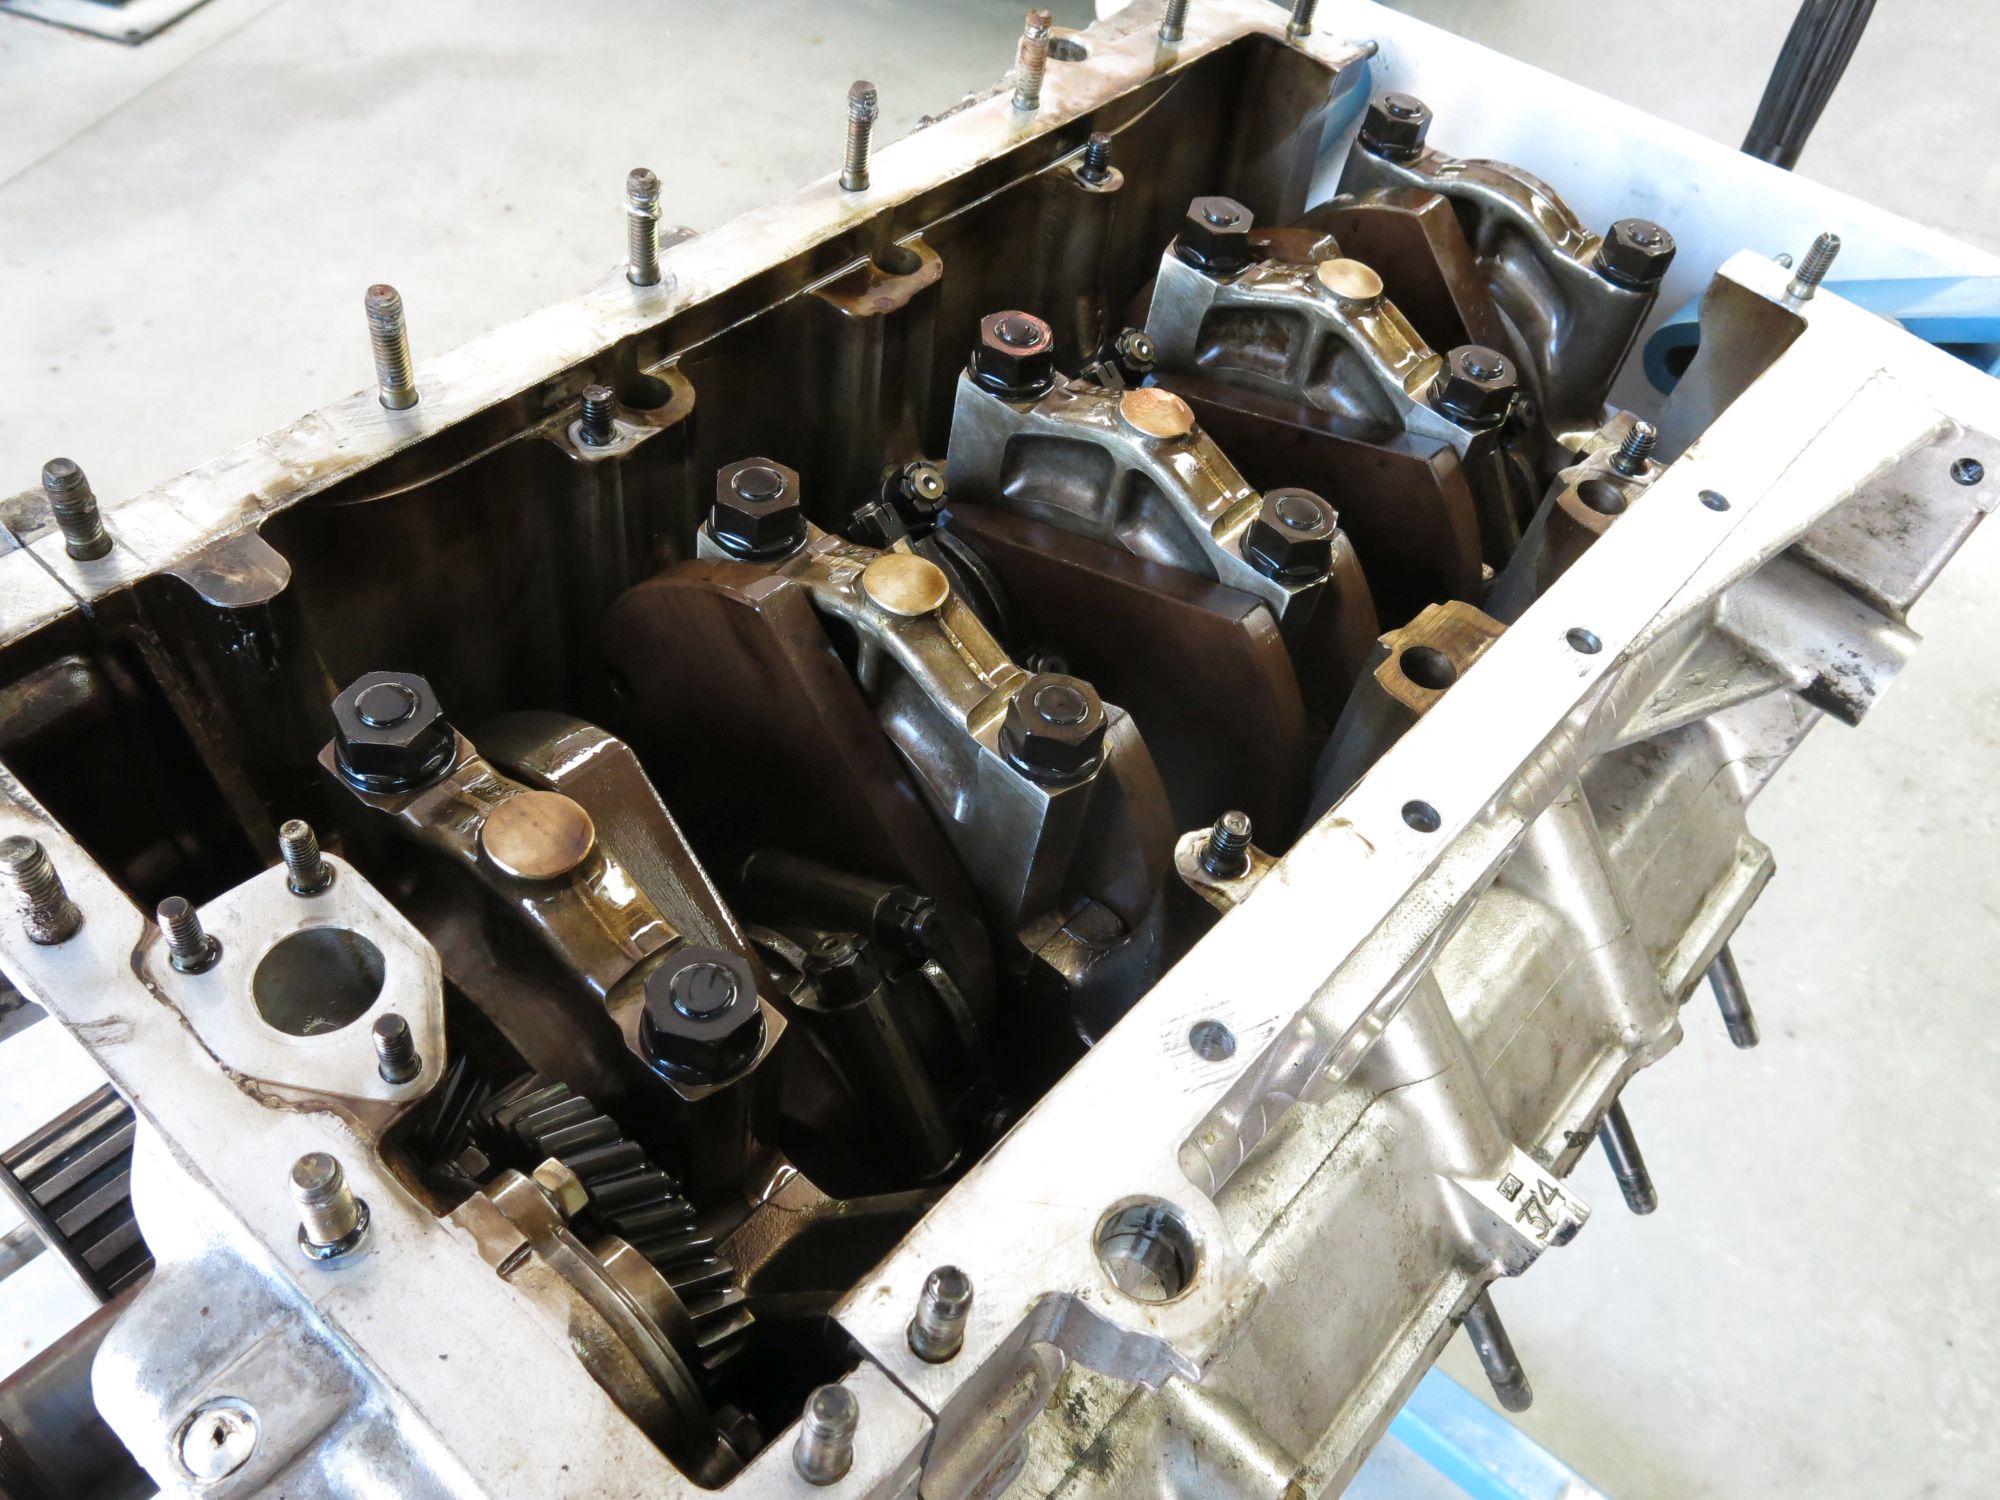
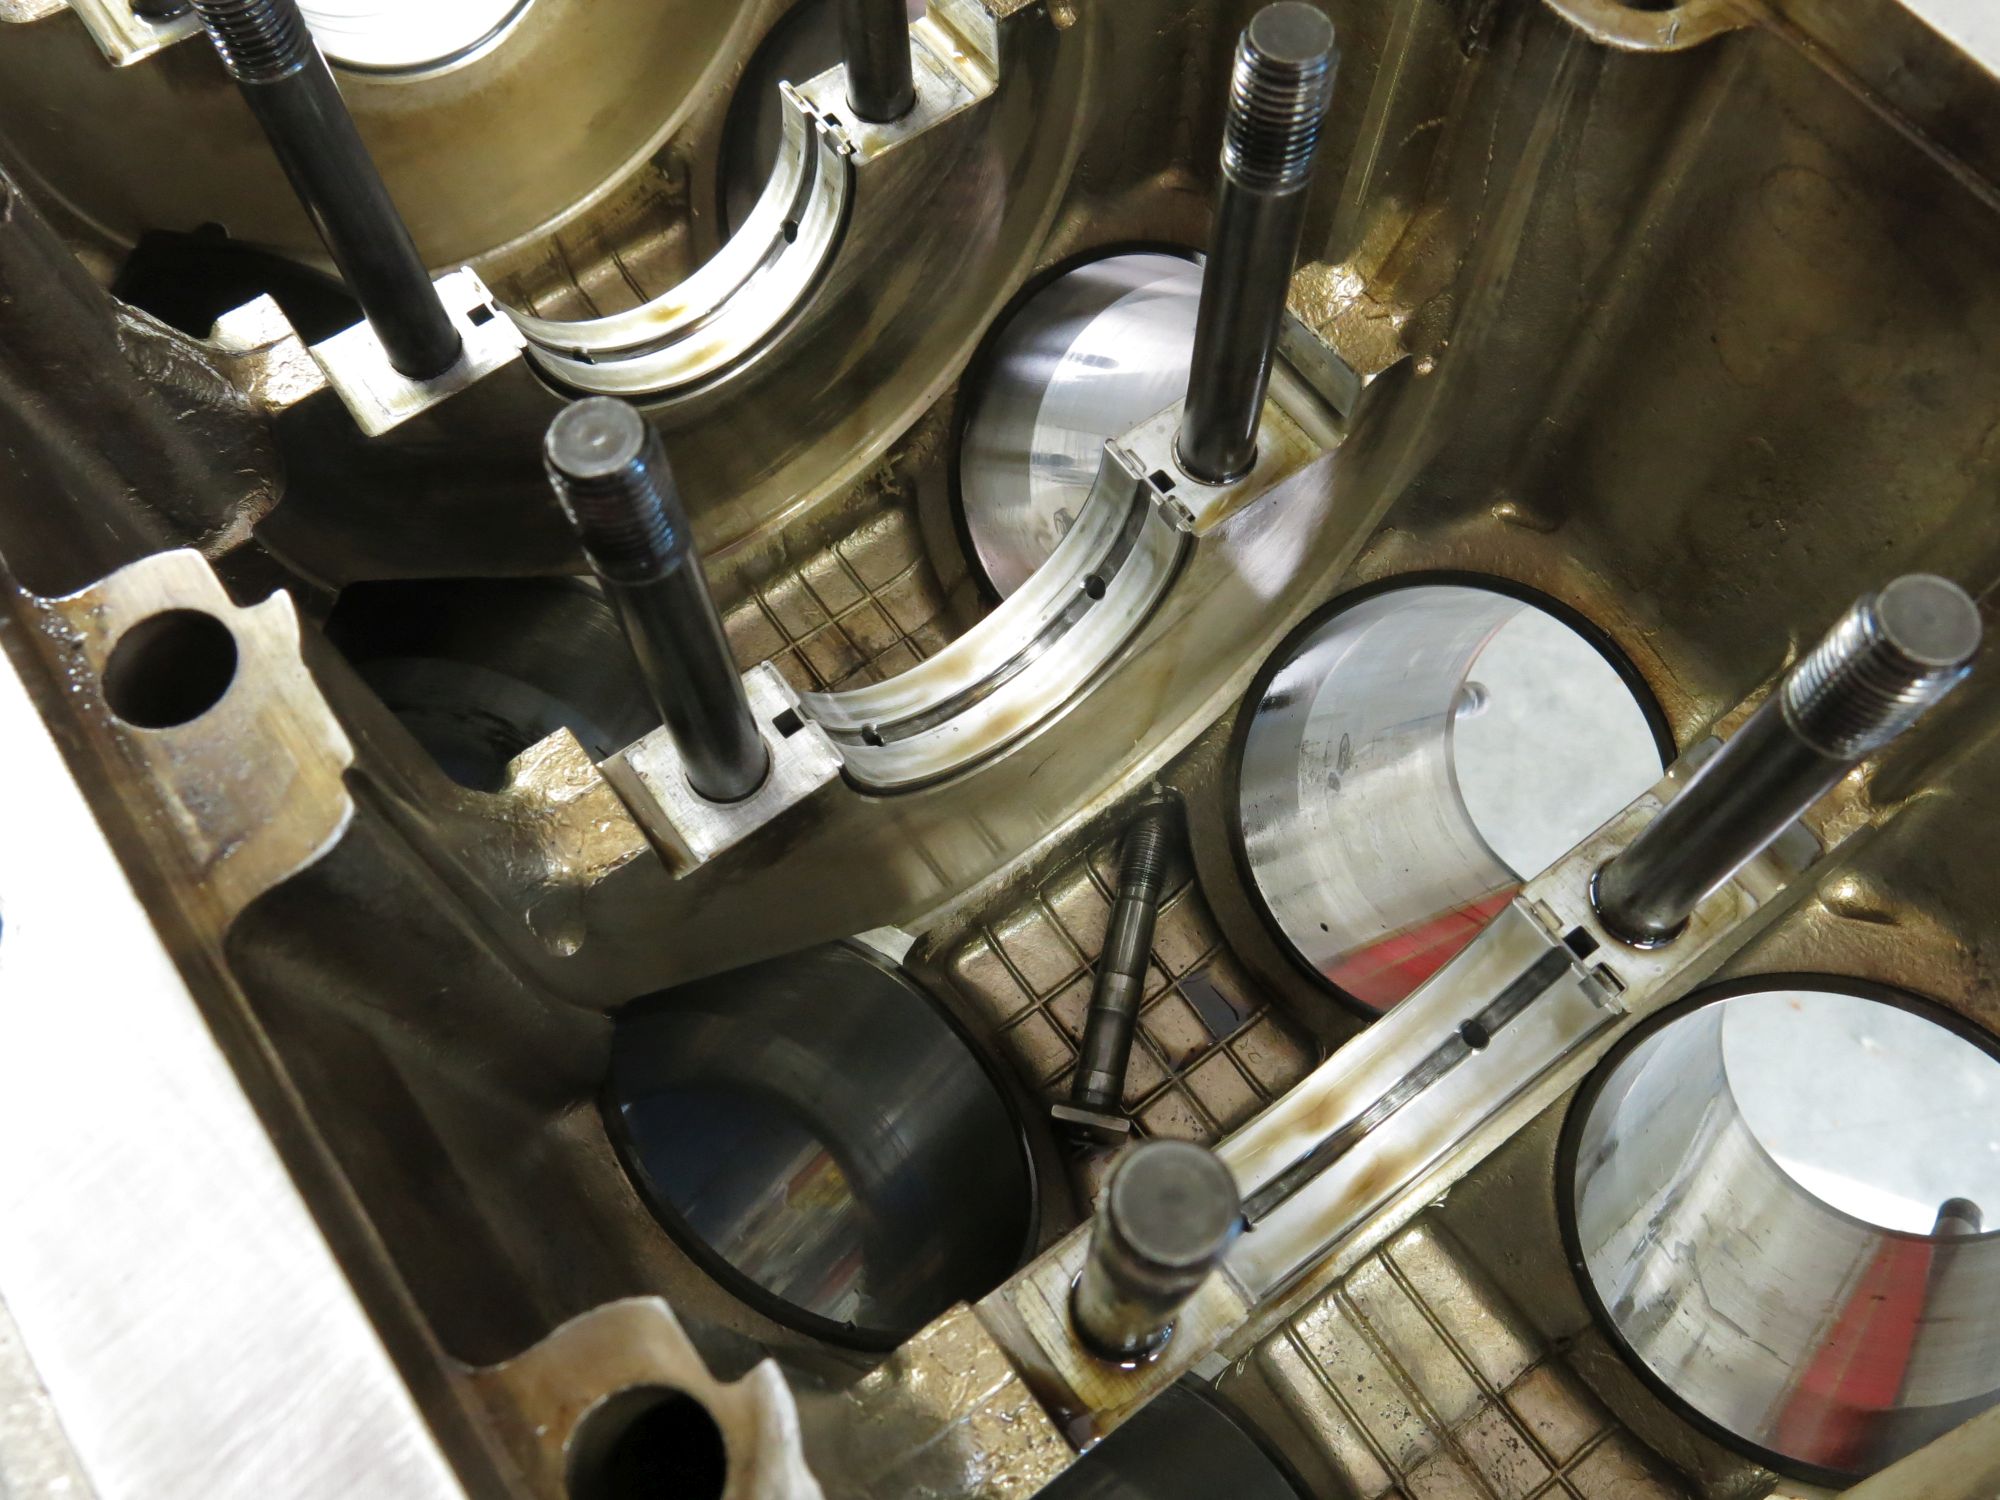
Here are some more photos of the engine coming apart
Thursday, June 30, 2016
Monday, June 27, 2016
Engine diassembled
The engine has been disassembled and the crankshaft and heads are at the machine shop.
Here's what David has discovered so far:
-Both the main and rod bearing crankshaft journals look very nice.
Presuming that the crank shaft passes a Magnaflux inspection, we’ll be
in good shape using “standard-sized” bearings.
-Rod bearings were in very poor condition
-Main bearings look good and exhibit normal wear patterns. However, there is some evidence that dirt/debris went through the oiling system..
-Timing chest bearings; 1-4 bank, OK. 5-8 bank, very loose and noisy
-Liners; With all of the pistons out, the wear becomes much more obvious. Some of the rings have light corrosion visible. The bores should .001-.015” taper with considerably more (about 2x) ovality. The liners will be removed for inspection, as the iron is susceptible to corrosion/pitting etc. Some is to be expected and will be cleaned up as needed. Presuming they are still serviceable, we’ll bore to the first over-size.
Sunday, June 26, 2016
A visit to the shop
It just so happens that I was traveling for work and I had a layover on the East Coast so I decided to take a side trip to go visit the shop. I flew in to Logan International, rented a car and drove up to see David in New Hampshire. Even though he has some helpers, Ferrari of Bedford is basically a one man show. David runs the shop out of his house and multi-car garage. It's clean facility and a nice change from the massive service center at the dealership. I'm sure it gets pretty busy around there with customer cars but I think he manages pretty well with what's there.
Engine disassembly has started. One head is off and other is stuck (as many 308 heads are) but David assures me that he can get it off without too much drama. He's pretty sure that the engine has never been apart before, which is a good thing. Who knows what kind of work may have been done by previous mechanics. Apparently, David has seen some hack jobs inside other engines.
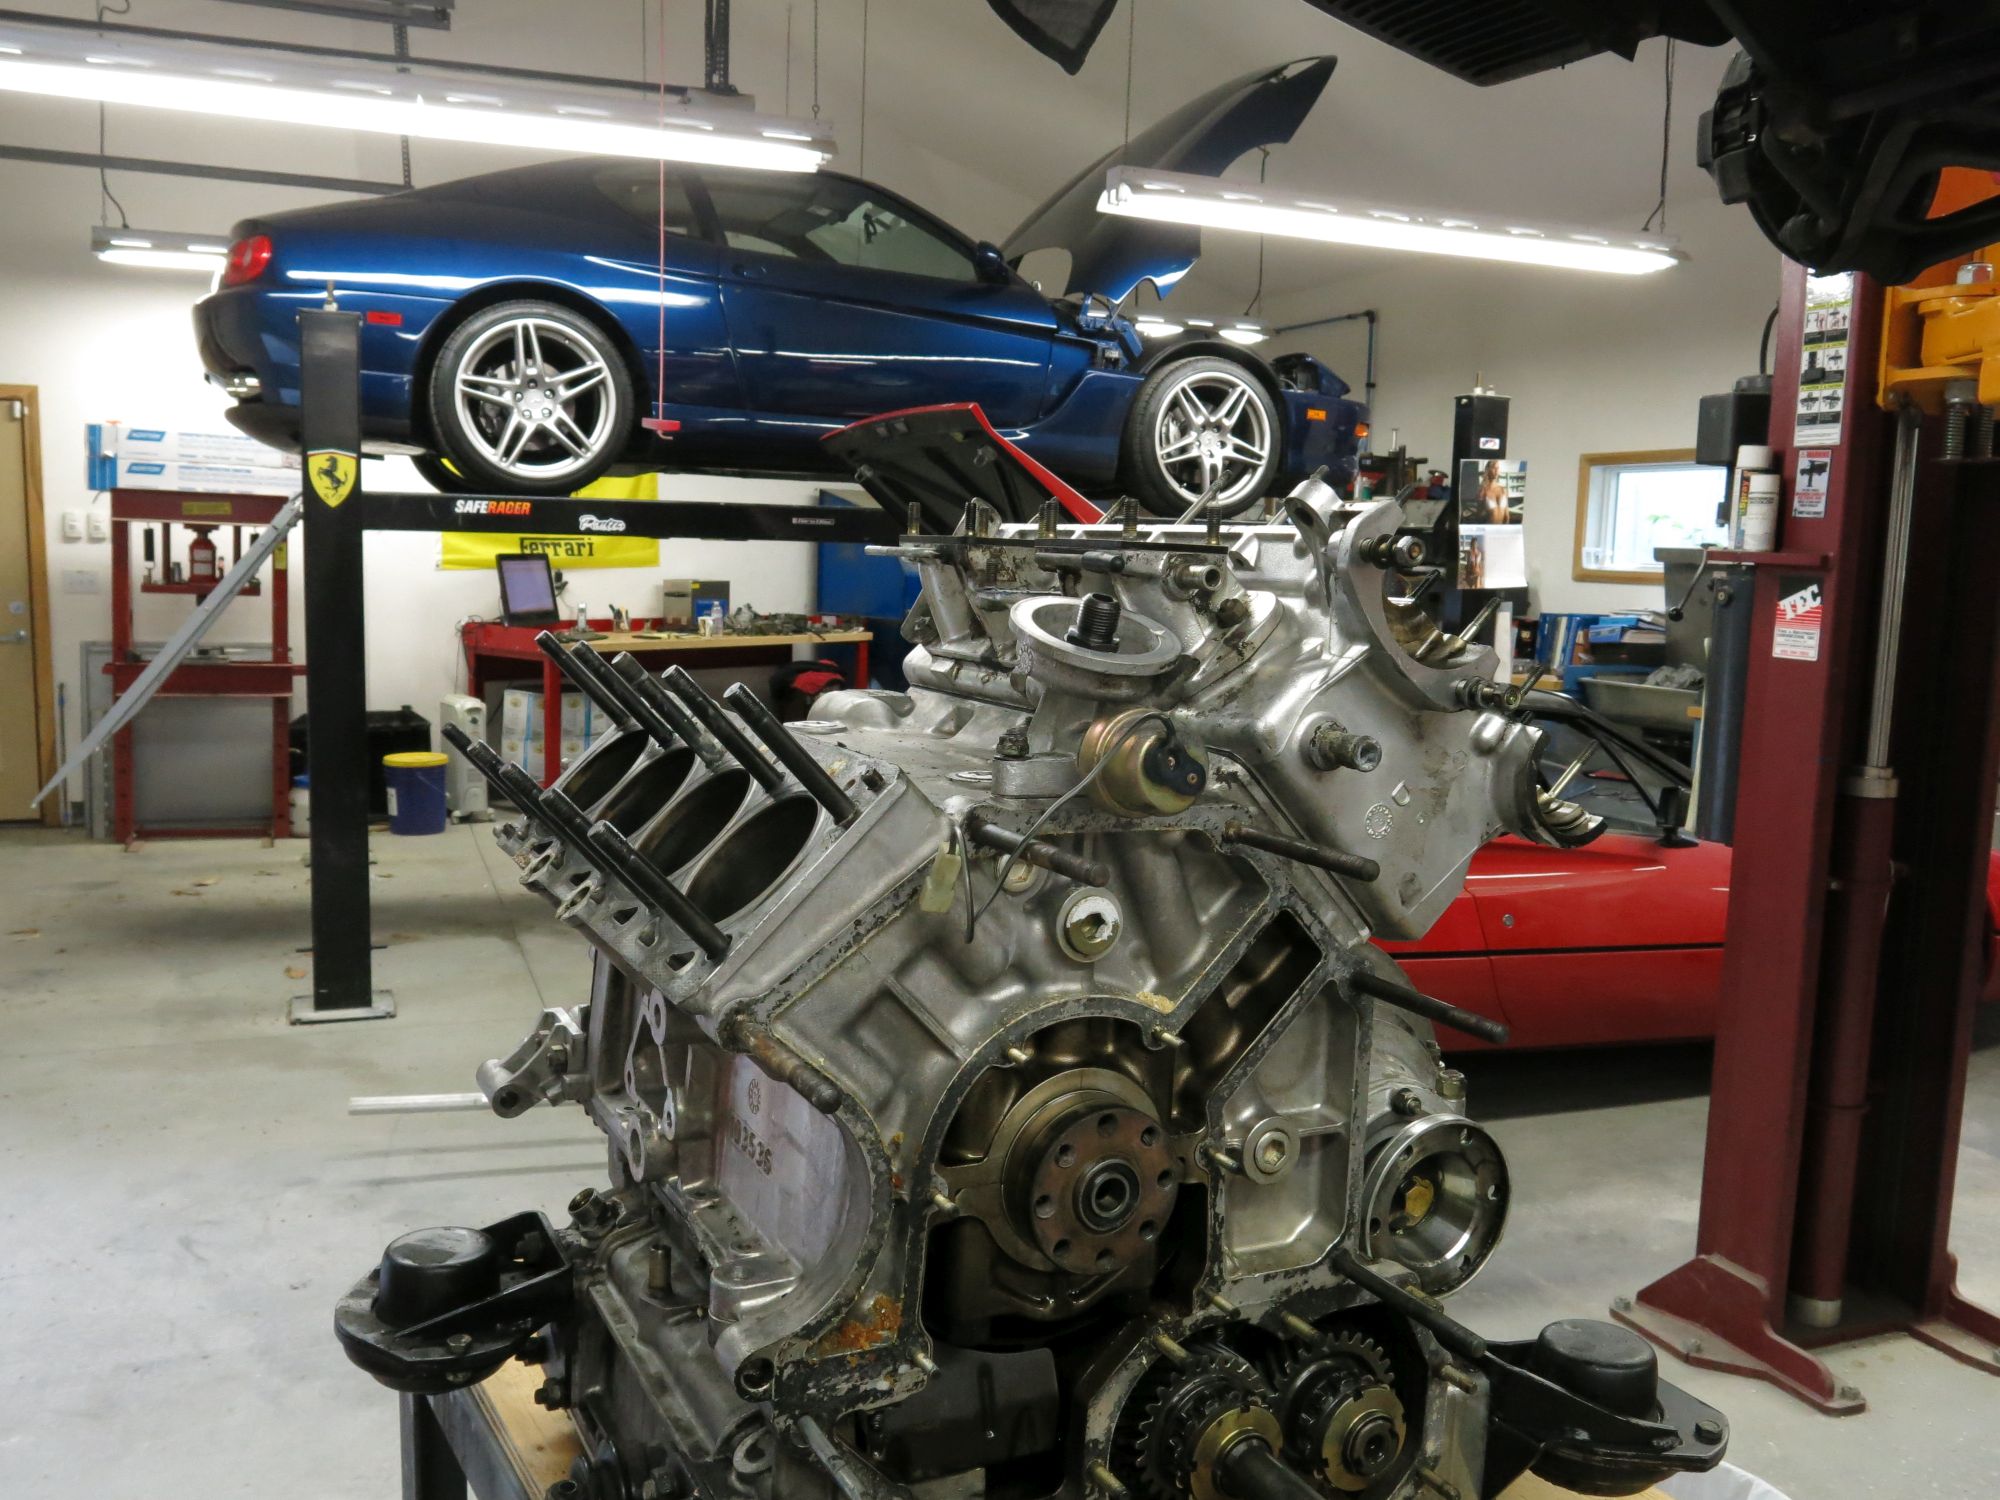
We spent a few hours talking about next steps. He's going to tear down the entire engine and transaxle, then determine what needs to be replaced and reconditioned. This is where the variability comes in -- he won't know for sure what's wrong with the transaxle until it's disassembled. We spent so much time talking that I lost track of time and almost missed my flight home! I did not factor traffic and time to return the rental car. Luckily I was one of the last people through the door.
Sunday, June 19, 2016
Dignostic results
The main thing I wanted fixed was the transmission. Since the engine had to come out anyway, it was a good time to do a full evaluation to determine its condition. The results were not good.
Here are the numbers from the cylinders:
| Cylinder | Dry | Wet | % change | Leak % | Source 1 | Source 2 | |
| 1 | 136 | 160 | 17.65 | 19 | Rings | Intake | |
| 2 | 130 | 155 | 19.23 | 21 | Rings | ||
| 3 | 130 | 140 | 7.69 | 17 | Rings | ||
| 4 | 130 | 141 | 8.46 | 19 | Rings | ||
| 5 | 100 | 135 | 35 | 20 | Rings | Exhaust | |
| 6 | 95 | 125 | 31.58 | 20 | Rings | ||
| 7 | 95 | 120 | 26.32 | 21 | Exhaust | Rings | |
| 8 | 100 | 122 | 22 | 20 | Rings |
The compression numbers are definitely low and the large jump in wet compression says that the rings are shot. Leakdown of 20% is horrible too.
My head is starting to spin. The initial estimate was a big number and needing to rebuild the bottom end will shoot that number through the roof.Friday, June 17, 2016
Engine out!
Monday, June 6, 2016
Some alarming discoveries
Every now and again, someone tells you something that is so unbelievable that all you can do is scrunch up your face and say WTF? I head earlier shared with David the compression and leakdown numbers that came from the dealer. The first thing he wanted to do was to confirm those numbers to get a good handle on the engine condition.
Here's his response after some initial investigation:
"Although the compression/leak numbers are odd, one of my immediate findings is that 3 of the 8 spark plug ends are not connected to the plugs!"
After digging further:
"Plugs are out.
1-4 rich-fouled
5-fouled
6-lean
7-No spark plug installed!
8-lean
I thought it was odd that I could not feel the #7 spark plug with my plug socket. However, no plug was confirmed with my inspection camera…"
WTF??? Since the 308 was at the dealership, it has really only been driven home, to and from E@RT once, then to the pick-up point and from the drop-off to the shop. The last people to touch the engine was the dealership. Can someone there have really been so incompetent as to FORGET TO PUT A SPARK PLUG BACK IN??? As you can see from the inspection camera photo, there's a lot of residue around the plug hole and it's clear that plug has been missing for while.
I'll find out more as compression and leakdown tests are done.
Saturday, June 4, 2016
Change of scenery for my 308
My 308 is now on the East Coast! The hauler arrived today and had to drop off at a local Walmart parking lot because the 87' truck could not get through the windy roads. On the short drive from the drop-off point back to his shop, David was able to do a quick evaluation:
"We’ve got our work cut out for us ahead. I suspect that she’s running maybe on 5 cylinders and has a significant vacuum leak somewhere, based on the way she smells...
I’ll get the diagnostics done this week and report back when I now more.
The transaxle is well, as you described."
Ok, good -- so it's not just that I don't know how to shift this Italian transmission. There actually IS something wrong.
Monday, May 23, 2016
Bye bye, for now...
In the last few months, I had been in contact with David Feinberg with Ferrari Service of Bedford. David has worked on a few local cars that came from the East Coast, and he has a very good reputation. I had already made the decision of not using my local dealership for the mechanical work. After all , they deal mainly with newer cars and I didn't feel comfortable in their understanding of the 308 engine and transaxle. The shifting was really keeping me from fully enjoying driving and something needs to be done.
After lots of soul searching, I decided to have the car shipped across the country to David to do the mechanical work. Here's the list of things I'd like him to address:
- Evaluate engine condition (confirm dealer inspection results)
- R&R engine and transaxle
- Gearbox rebuild to fix 2nd gear downshift issue
- Cylinder head work (seals, guides, valves)
- Ceramic coat headers
- Rebuild carburetors
- Cam timing and belt service
- Final tuning
- Replace rear A-arm bushings and 4-wheel alignment
Monday, April 4, 2016
Well, the waiting game is over for now
It took a while but I got an inspection report and quote from the dealer. The list was long and after a lot of internal and external conversations, I'm choosing to not get the work done by the dealer right now. The number was big -- BIG as in close to the value of the car. I shouldn't have been surprised though and in the back of my mind I knew what I was in for. Part of it is that this is really Pandora's Box. Any estimate at this point is just a shot in the dark. What are they going find in the gearbox? Some of those internal parts are almost impossible to find and cost a King's ransom if you can find them. Until the parts are all laid out on the workbench, no one knows for sure which parts need to be replaced and how much it will all cost.
My current thinking is that I will continue to enjoy the car as much as possible for the next month or two, then ship it off to get repaired.
Friday, March 4, 2016
Playing the waiting game
Tuesday, February 9, 2016
Back to where it all began
Some things happened last Fall that made me think about a lot of things. One of those things was the 308 and how for many years I've been avoiding the elephant in the room -- my impending engine and transaxle rebuild. I've been saving my pennies for the inevitable and that day has finally come. A few weeks ago, I attended a tech session at Ferrari and Maserati of Seattle and got to talking to a few of their technicians. I decided to take the next step and bring my car in for what is essentially a pre-purchase inspection. They will go through the entire car, focusing their attention on the drivetrain including compression and leakdown tests. From that, they should be able to tell me the condition of the engine so that I have an idea on how much needs to be done. The next step will be to pull the engine out and tear it all apart to see the condition of the parts. They won't be able to give me a cost estimate until they can actually see what needs to be replaced.
So here my car sits, in the walls of the former Grand Prix Motors building where it all began. I can imagine the day in 1978 when my car rolled off the car hauler and into this shop for the first time. I don't know how many times GPM serviced the car in the years following 1978, but I think I can pretty safely say that my car has not been back here since the late '80s.
Break out the checkbook and let the money start flowing!
Friday, April 17, 2015
Ferrari 308 GTS Steering Rack Rebuild -- the EASY way
Rebuilt rack looking good with new boots and new outer tie rod ends. The inner ends are metal and adjustable so they were just tightened up. My rack was completely dry inside with just trace amounts of lubrication. JH355 uses grease which is less prone to liquefying and leaking out. There was a little wear to the center part of the rack and he adjusted it with the correct amount of play at the center which means it's a little tighter at the ends. Since the rack near the center most of the time, this is the best way to set it up.
Overall, the rack was in pretty good condition. JH355 said it was one of the better ones that he's seen. I suspect that the rack was probably replaced at some point in the past, but I have no way to confirm that. Below is the infamous passenger's side bushing. Most of the time, it's completely destroyed. Mine was intact but was worn to allow about 1-2mm of play. The replacement bushing is delrin and machined with a spiral groove to allow lubricant to travel from one side of the bushing to the other. The original bushing is triangular shaped to allow this.
Now I just need to put it all back together. Last night I pressed out the other A-arm bushings and I just need to clean up the A-arms and apply the same anti-rust treatment as the other side. I also need to replace the shock bushings and I'll be ready to re-assemble. JH355 reminded me that the steering will be much more precise so be careful driving for the first time on new bushings.
Wednesday, April 8, 2015
More disassembly and some reassembly
Saturday, March 7, 2015
Pressing out shock eye bushings
Pressing out the shock eye bushings turned out to be a fairly simple task, once you have the right tools. Isn't that always the case though? The right tools makes the hard jobs easy while having the wrong tools makes easy jobs impossible. For this job, I used a hydraulic press (12 ton cheapo from Harbor Freight < $100 on sale), a lathe, a 1 1/4" pipe coupler and a 1 1/4" pipe nipple. The 1 1/4" pipe fittings are almost the exact size needed to press out the bushing.
I started by turning the pipe coupler on the lathe. My goal was to turn the ID of the coupler to just smaller than the OD of the bushing shell. This will allow the old bushing to fall into the coupler as it's getting pressed out. Turns out that just removing the internal threads was enough of an ID reduction. Since I don't have a long boring bar, I did one side then had to flip over the coupler to cut the ID on the other side. After turning the coupler, I chucked up the 1 1/4" pipe nipple and cut the OD so it was just slightly smaller than the OD of the bushing shell. The end of the nipple comes to a knife edge so I faced it a little to get a flat surface to press against the bushing shell. I'm no machinist, but I'm starting to get pretty good at using the four-jaw chuck!
After turning, I set up the shock on the press. The shock eye sits on the pipe coupler below you press from above. I started by pressing out the bolt sleeve, then the rubber itself using sockets.
Then I set up the press using the pipe nipple pressing on the bushing shell. It takes some force to get it moving, but the 12 ton press did the job for me. There's a pop at the beginning just as the bushing shell starts to move and the rest is easy. You need to be careful at this step. The bushing shell is not very thick and lining up the pipe fitting to the shell is critical. I did both bushings on the shock this way. When I do the other shock, I think I'll try pressing out the entire bushing at once without pressing out the guts first.
Friday, March 6, 2015
Need to replace shock eye bushings too
Thursday, March 5, 2015
Left front suspension teardown
Here's another fine example of special action required for the tight space. The end of the hard brake line is hard to reach and I had to cut off my 11mm flare wrench to have enough room to actually turn the flare nut.
The original rubber A-arm bushings looked sad. The exposed outer parts were all cracked and falling apart. I'm going to be using the 13.3101G polyurethane bushings from Energy Suspensions and following the procedures from Birdman's post on Fchat . The OEM bushings are bonded to a steel shell and the shell is spot welded into the A-arm hole. Many people in the 308 community are using this alternate method which involves just replacing the guts of the bearing while leaving the shell in place. This is what I will be doing as well.
I started by cutting off the end of the bushing using a reciprocating saw, being careful to not cut into anything important. To press out the old rubber bushings, I planned on using my cheapo HF 12 ton press. That plan got changed when I realized the A-arm won't fit in the press so I dropped to the next idea which involved sockets, a C-clamp and a propane torch. Some people burn out the old rubber but I just used the torch to heat the bushing shell. This broke the bond enough for the makeshift press to force out the rubber.
Here's a shot of the old bushing next to the new bushing. The new one does come with a metal sleeve, but the guts pull out pretty easily. The polyurethane part is in two pieces and fits inside the A-arm shell perfectly.